Sorry for the delay in posting followers but I have been really busy!
So here we go and the final touches to the sleeve head and shoulders for my #Blazerof2016 challenge......
So in the last post I had set in the sleeves and was ready for the shoulder pads.
Now of course you don't need pads but a carefully made pair will really enhance the lines of the jacket and flatter the wearer. Long gone are the days of huge pads in the shoulder but unless you are going for the soft shoulder look (check out my Neapolitan Jacket make) a well constructed pair of shoulder pads will make all the difference. The pads and head roll you make will lift the sleeve cap level and form a lovely curve from the shoulder down the sleeve.
You can buy shoulder pads but be warned.....the majority are designed for women! (as are most patterns!) and are much narrower and much thicker/taller. So the solution is to make your own to suit. Men tend to have much longer shoulders (from neck to arm) more width (front to back) and they slope more than women!
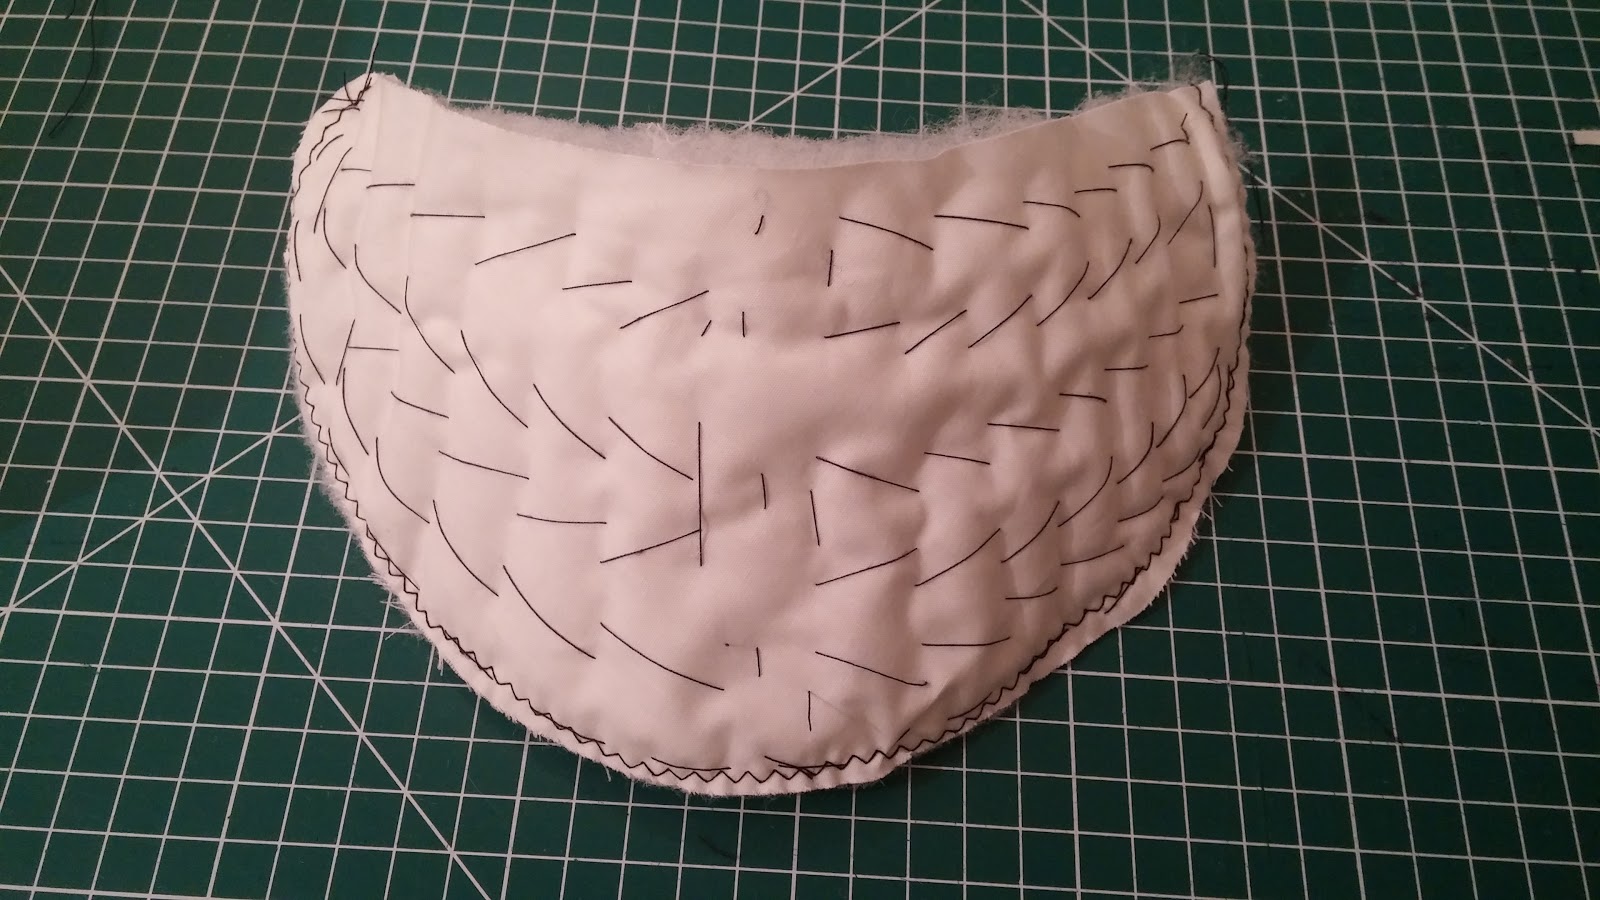
Cut 4 pieces of muslin or similar lightweight material. I will put a copy of my pattern on the blog asap. Note the shape is not symmetrical but elongated. The longer tip will go at the back of the jacket.
Next cut some poly or cotton batting (wadding) to the same shape. The thickness isn't too important but 10-15mm should be about right.
Carefully start to stretch the batting (wadding) from the centre to the edges. You want to taper it until it is very thin at the edges but still the same initial thickness in the centre.
Next sandwich between two pieces of muslin.
Pin together and baste along the long curved edge and down the centre. DO NOT pull the thread tight! Trim the batting (wadding) to the same shape as the muslin.
Pad stitch from the centre line towards the ends. Be gentle! Pulling the thread too tight will compress the pad. Pad stitch one side of the centre line then repeat for the other side.
As you pad stitch the shoulder pad will start to curve. Take your time and constantly trial fit to the jacket. If the pad is too pronounced tighten your stitches.
Next cut a length of fabric long enough to go around the top of the sleeve. From middle front to middle back. Cut the fabric around 75mm wide.
Now roll the cut fabric tightly and insert into the top of the sleeve (on the outside of the seam line) Make sure the jacket is turned inside out! Stitch the roll of fabric to the seam allowances.
Stitch the roll of fabric to the seam allowances and baste the shoulder pad in place. REMEMBER to put the pad on upside down so when you turn the jacket back the right way the pad will be curved correctly!
Try the jacket on and see what it looks like. If the shoulder pads are obvious too big (high) then tighten the pad stitches a little. The important thing is when the jacket is being worn, the shoulders look level. We are all a bit different so it is a little trial and error.
Before pads and roll fitted
After
*Note the photos were taken with jacket on the mannequin not on me!
It takes time but well worth it. When you are happy carefully sew the pads in place (by hand) along the arm seam allowance and at the shoulder seam allowance.
Right thats it for tonight......Next up is the lining and finishing touches before the reveal!
Until next time.......Happy sewing
Labels: #Blazerof2016